Photo to Vector: What You Really Get and Which Free Tools to Use
A photo turned into a vector becomes a flat-color illustration. How many colors to keep, how to prep the photo, free tools, and when not to bother.
By Gaël Pons
Published
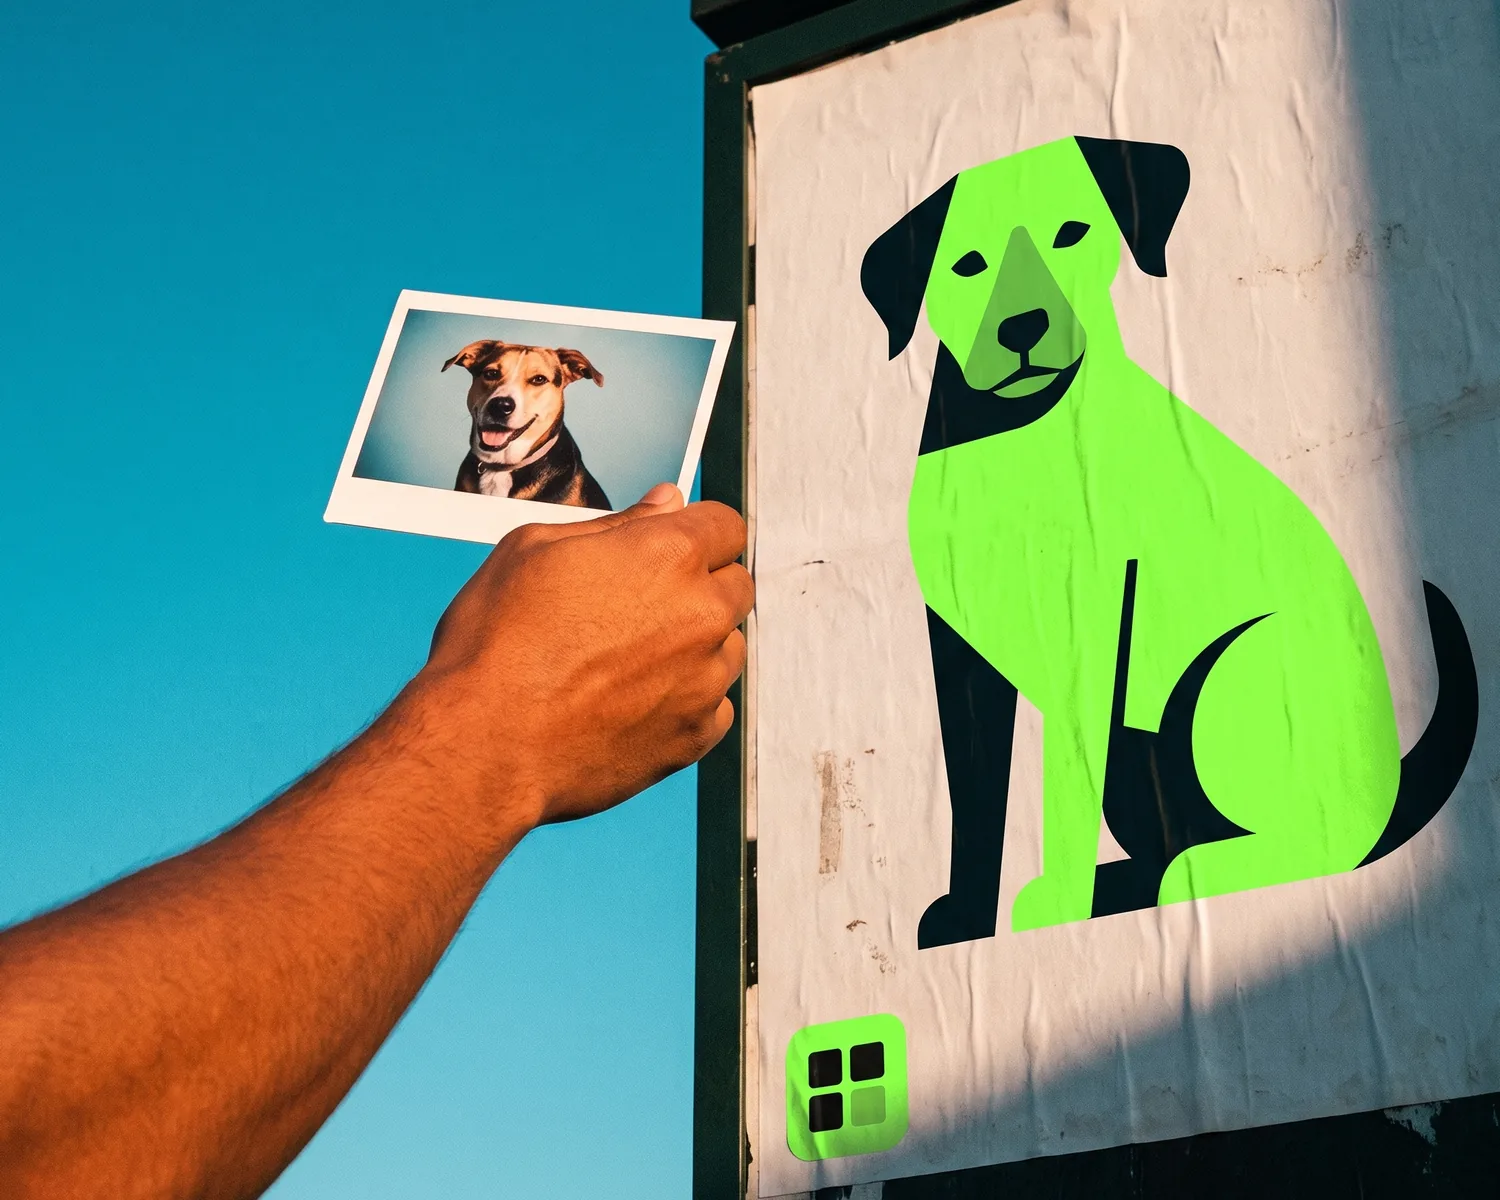
Converting a photo to vector works, but what comes out is an illustration, not a photo: thousands of subtle shades get merged into a handful of flat colors. That’s perfect for a stylized screen-printed portrait, a stencil or an engraving. To print a faithful photo, keep the original high-resolution image instead.
Can you really turn a photo into a vector?
Yes, a photo can be turned into a vector with the same tools used for logos, but it changes nature along the way. A vector file, built from geometric outlines instead of a mosaic of pixels, can’t reproduce a smooth skin tone pixel by pixel: it splits the picture into zones and fills each one with a single color. The idea is covered in more depth in what a vector image is.
What does a photo look like once it’s vectorized?
A vectorized photo looks like a poster or a pop art portrait: edges stay crisp at any size, soft shadows turn into solid patches, and highlights vanish. The subject is still recognizable, often with real character, but nobody will mistake it for a photograph.
That look isn’t the tool failing; the format itself works that way. The more colors you keep, the closer you get to the original, and the more shapes pile up in the file.
How many colors should you keep when converting a photo to vector?
When converting a photo to vector, the number of colors is the setting that decides everything, and you pick it based on where the image will end up.
| Colors | What you get | Typical use |
|---|---|---|
| 1 or 2 | High-contrast silhouette | Stencil, laser engraving, rubber stamp, vinyl cutting |
| 3 to 8 | Stylized, poster-like portrait | Screen-printed t-shirt, sticker, illustration |
| More than 12 | Close to the photo, but smoother | On-screen graphic effect, heavy file |
In screen printing, every color needs its own screen, so a four-color portrait costs far less than a twelve-color one; screen printing a logo explains how that works. Ask your printer how many colors they’ll take before you start.
How do you prepare a photo before vectorizing it?
A photo needs four quick fixes before vectorizing, because the converter exaggerates every flaw:
- Pick a sharp, well-lit subject, never backlit: a hard shadow turns into a black blob.
- Simplify the background, or remove it: a busy scene becomes dozens of stray shapes.
- Bump up the contrast a little in any photo editor so the zones separate cleanly.
- Crop tight on what matters: a face that fills the frame keeps far more detail than a tiny face in a landscape.
A drawing photographed on a desk needs different prep (even light, white paper): see how to vectorize a drawing.
Which free tools can convert a photo to vector?
Three widely used tools can convert a photo to vector with a real color-count setting:
- Photopea, free in your browser: Image > Vectorize Bitmap, with a noise reduction option that helps on photos.
- Inkscape, free to download: Path > Trace Bitmap in “Multiple scans” mode, with the number of colors set by hand.
- Illustrator, by subscription: the Image Trace panel offers “High Fidelity Photo” and “Low Fidelity Photo” presets, which you then simplify by lowering the color count.
Whatever you use, zoom to 400% on the tricky parts of a portrait, especially the eyes and mouth: one misplaced shape can change an expression. For the full method, from the starting file to the final format, follow our guide to vectorize an image.
What if your photo shows a logo?
A photo of a logo, snapped from a flyer, a shop window or the side of a van, converts to vector far better than a portrait: a few solid colors, simple outlines. It’s often the only copy left when the original designer is long gone.
That’s the kind of everyday file Depixelise is built for: upload the picture as it is (JPG, PNG or WebP, 10 MB max). Depixelise strips the backdrop and rebuilds the outlines in roughly ten seconds, with the result displayed full size. Four files reach you by email, 100% free: an SVG, a transparent 2000 px PNG, a single-ink copy and a negative copy for dark surfaces. Shoot the logo straight on with no glare, and check the preview against your photo before it goes to the print shop.
When should you not turn a photo into a vector?
You shouldn’t turn a photo into a vector if you want it printed as a photo: on a flyer, a poster or a digitally printed t-shirt, the shop prints the image directly. What matters then is its resolution at print size, explained in what 300 DPI means.
Another tempting mistake is using a photo as a logo. Even vectorized, it stays too busy to read on a business card or an embroidered polo. A logo gets drawn, and that’s a designer’s job: here’s when to redraw a logo. For a portrait you want stitched, the simplification goes even further, as shown in turning a photo into embroidery.
FAQ
Why does my vectorized photo look like a cartoon?
Because vectorizing replaces gradients with zones of solid color. That’s how the vector format works, not a bug in the tool.
Will a vectorized photo print sharper?
A vectorized photo keeps sharp edges at any size, but it has lost detail along the way. For a faithful reproduction, a high-resolution photo is still the better file.
Why is my vectorized photo file so large?
In a vectorized photo, every color zone is stored as a detailed outline. With many colors, a photo can produce thousands of shapes, and the file can end up heavier than the original image.
Can you get the original photo back from the vector version?
No, the shades merged during vectorizing are gone for good. Always keep a copy of the starting photo in case you need to try again with other settings.
Should you remove the background before converting a photo to vector?
Yes, removing the background before converting a photo to vector is a good idea: it stops the scenery from turning into a crowd of useless little shapes. A plain, light background well separated from the subject already gives a clean result.